
Table of contents
ORDER CREATION PROCESS: VIA FORM
Procedure Sheet - DROPIOO Platform
Prerequisites
Before creating a delivery order, make sure that:
You have an active and properly configured DROPIOO account (with at least one warehouse created).
At least one vehicle and one driver have been added to the system.
You have the customer's information and the details of the products to be delivered.
Overview
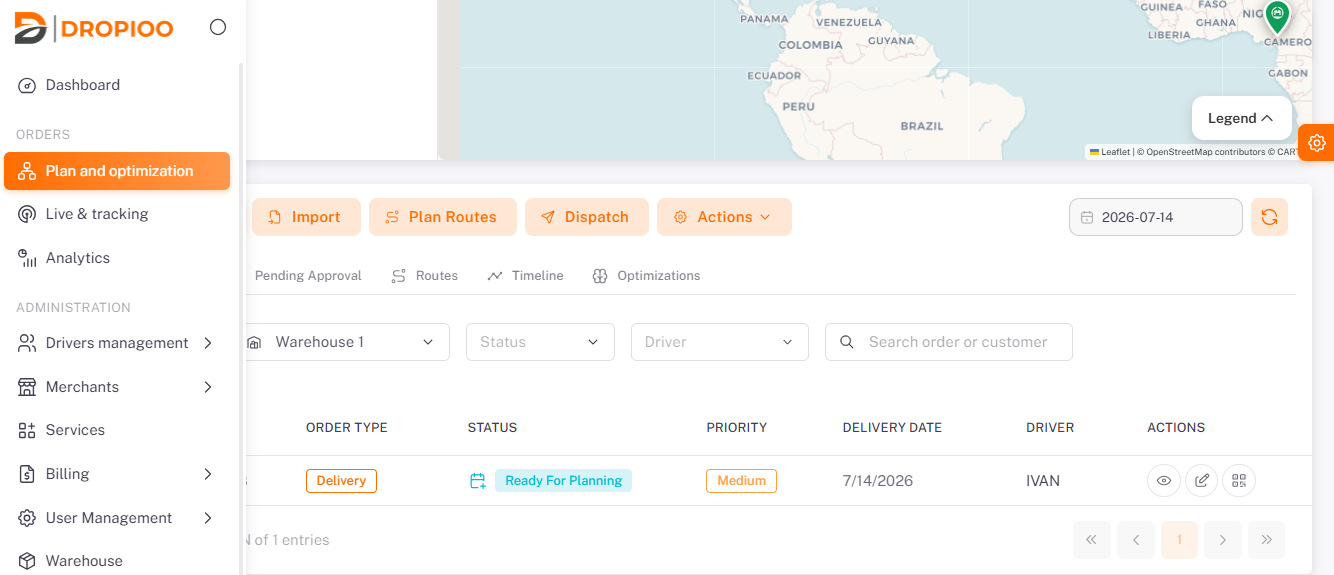
From the dashboard, the user must first click on "Plan and optimization", then click on "New order".
Creating a delivery order
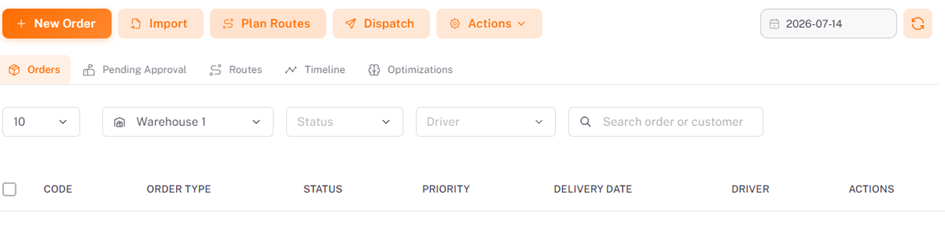
The user can create a new delivery order to organize and track shipments via the DROPIOO platform. To do this, click on "New delivery order", then follow the configuration steps in the form.
Order Creation Steps
Creating one or multiple delivery orders consists of the following steps.
Step 1 – Order Information
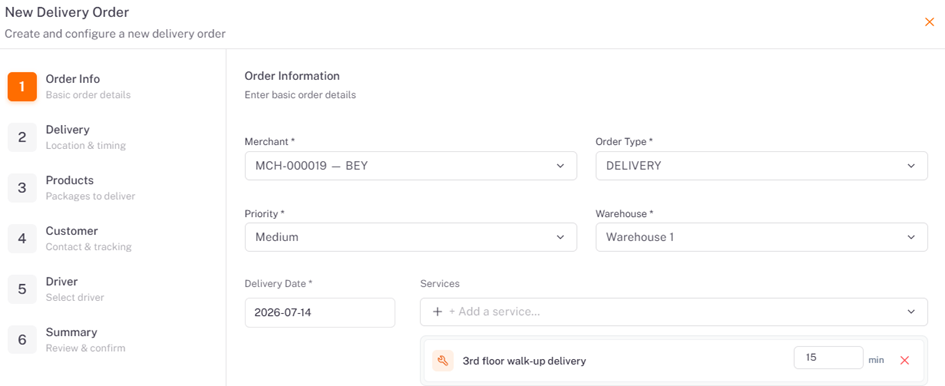

This section captures the general information about the delivery order.
The user must:
Select the merchant (the merchant invitation must have been accepted beforehand). A default merchant can also be selected.
Select the order type.
Set the order priority.
Choose the warehouse.
Select the delivery date.
Select the service.
Add comments (optional).
Specify any skills or qualifications required to complete the delivery.
Click Next to continue.
Note: All fields marked with an asterisk (*) are mandatory.
Step 2 – Delivery Details
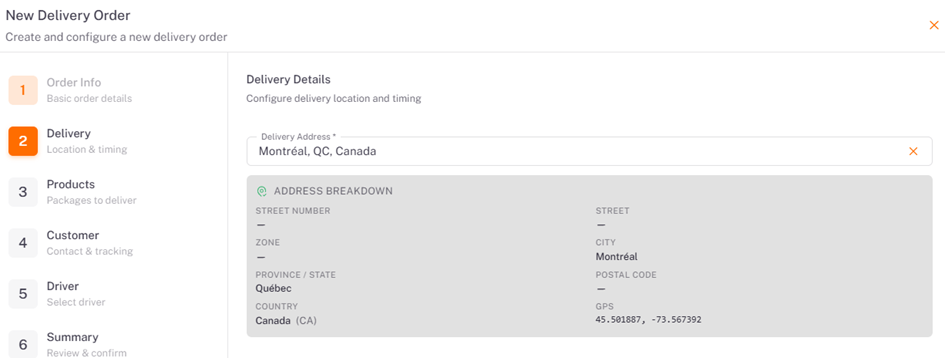
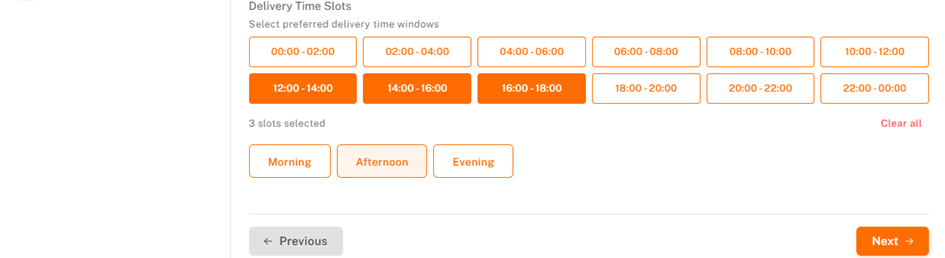
In this step, the user specifies:
The delivery location.
One or more delivery time windows.
Once the information has been entered, click Next.
Step 3 – Products
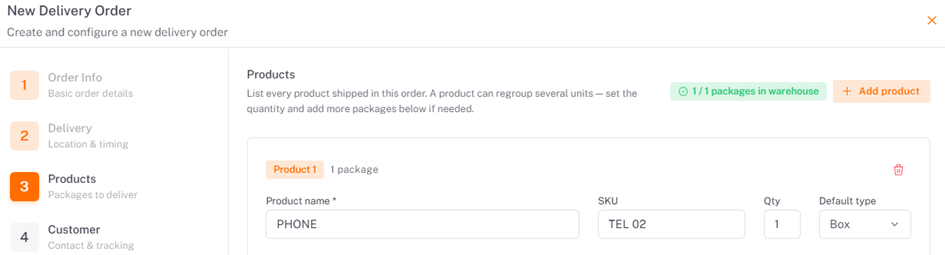
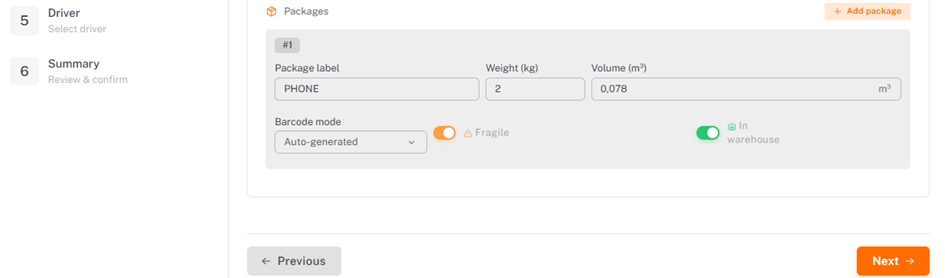
This section allows users to add the products included in the delivery and define their characteristics.
The user can:
Add one or more products to the order.
Create an order for products that are not yet available in inventory.
Enter the product label or description.
Specify the product's weight and volume.
Select the barcode generation method:
Automatically generate a barcode;
Scan an existing barcode;
Enter the barcode manually.
Indicate whether the product is fragile.
Specify whether the product is currently stored in the warehouse.
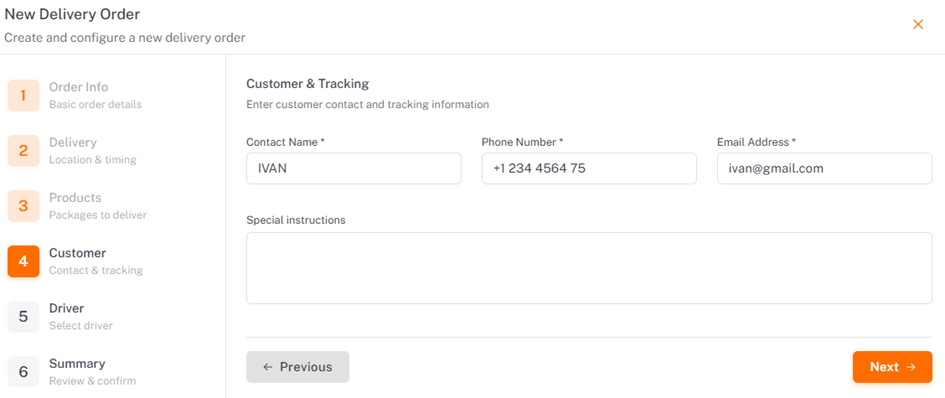
Step 4 – Customer Information
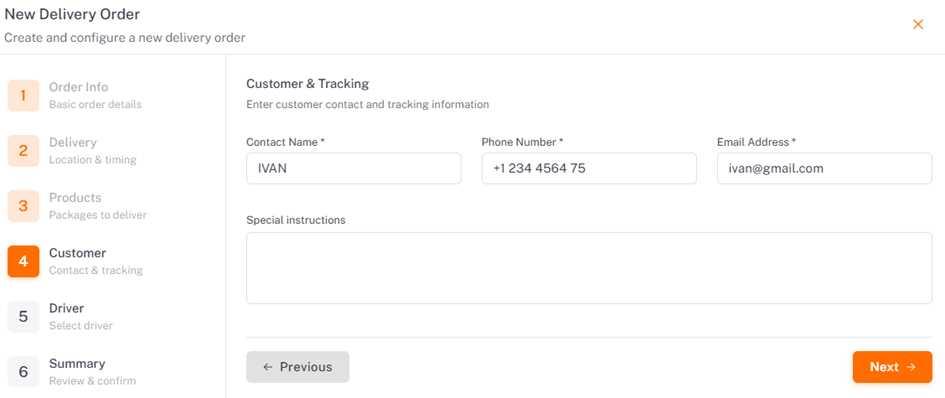
Enter the customer's information to ensure accurate order tracking and complete delivery traceability.
Step 5 – Driver Assignment
Select the driver responsible for completing the delivery.
Important: Assigning a driver during order creation is optional. A driver can be assigned later if needed.
Step 6 – Order Summary
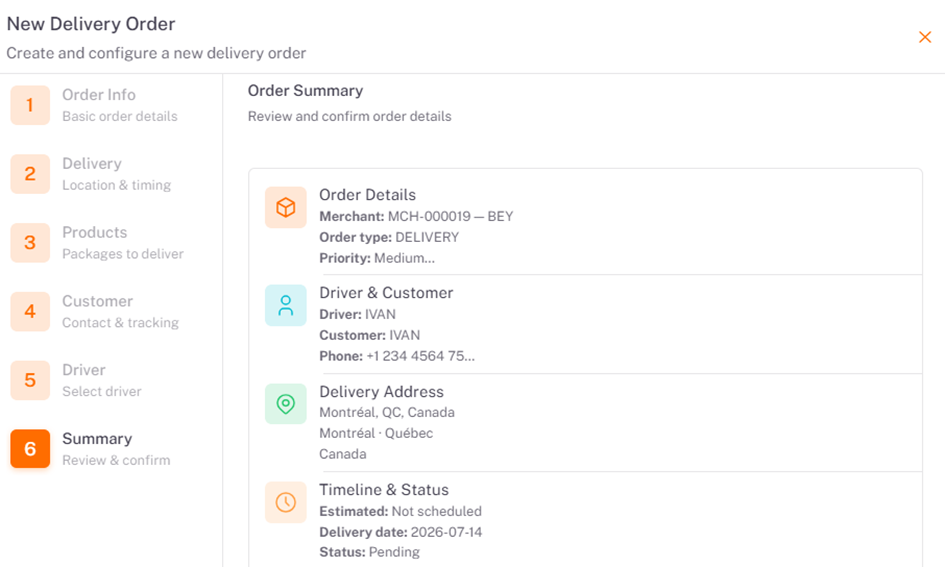
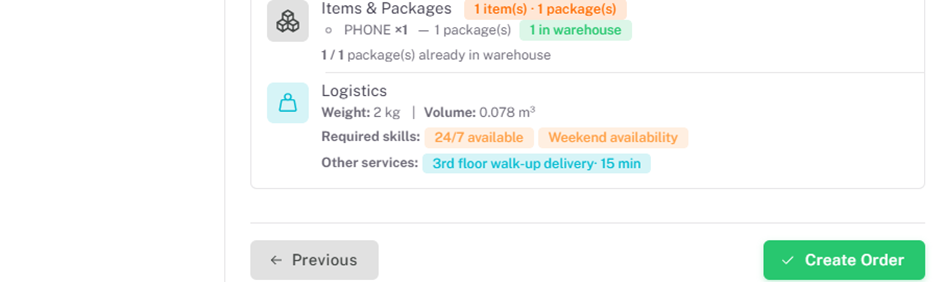
The final step allows the user to:
Review all the information entered.
Confirm the delivery order.
Validate the order.
Click Create Order to complete the process.
Order Confirmation
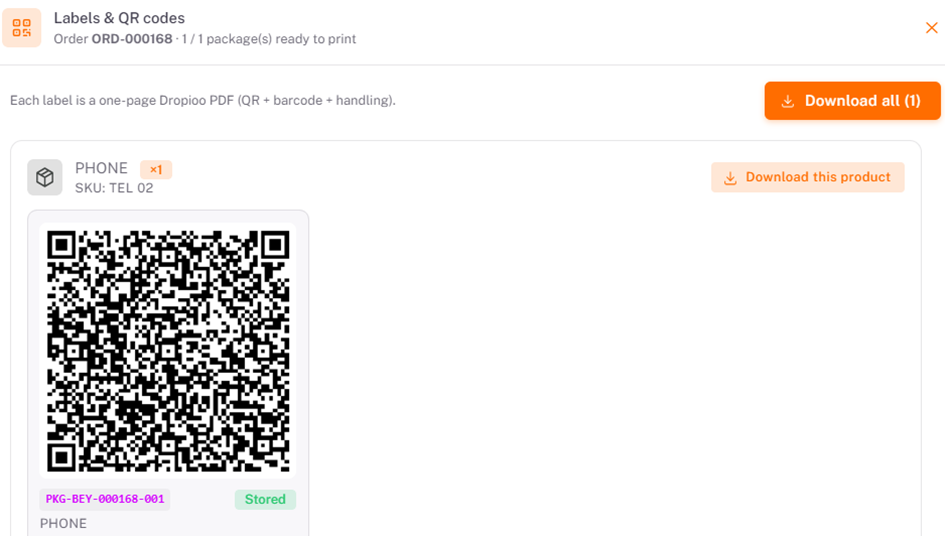
Once the order has been created successfully, the system displays the order's QR code along with its shipping label, which can be downloaded for printing or future use.
Was this article helpful?
Still need help?
Contact support