
Table of contents
Warehouse Creation Process
Procedure Sheet - DROPIOO Platform
Prerequisites
Have an active administrator account with access to the Administration section;
Have the complete address of the warehouse;
Know the warehouse capacity in square feet;
Know the scheduled operating hours (if applicable)
Steps
To create a warehouse, the user must navigate to the Administration section and click on "Warehouse".
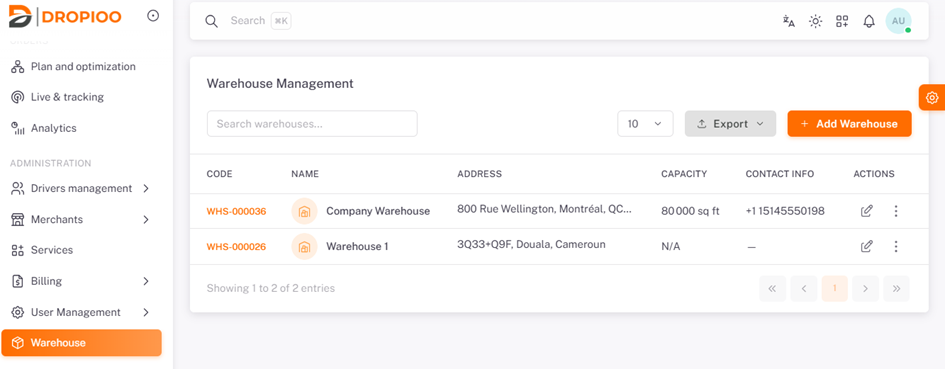
Next, click on the "Add Warehouse" button, then fill in the required details in the creation form.
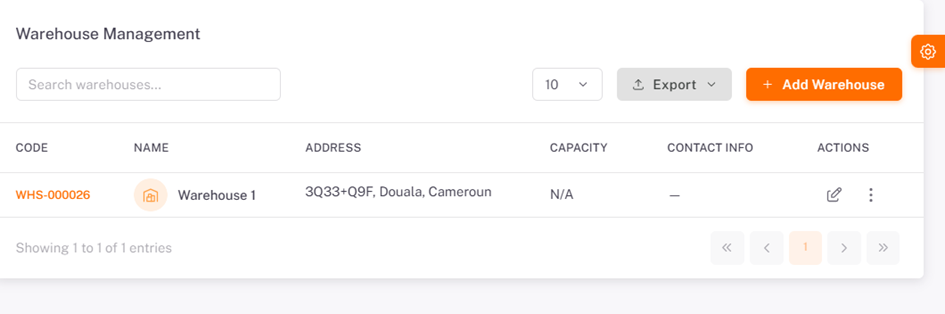
Required Information
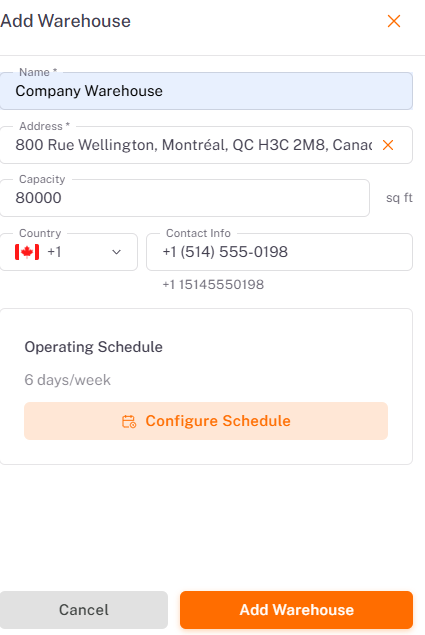
The user must enterName: Enter the warehouse name (e.g., Main Warehouse);
Address: Enter the complete physical address of the warehouse (e.g., 350 Saint Street...);
Capacity: Specify the warehouse total capacity in square feet (e.g., 5,000 sq ft);
Contact Information: Add a phone number or primary contact detail (e.g., (555) 123-4567);
Operating Schedule: Set the opening hours of the warehouse (Default: No operating hours defined);
Click "Add Warehouse".
Warehouse Configuration
Once the warehouse has been created, the user must configure its layout to accurately reflect the physical organization of the actual warehouse. This configuration makes it easier to organize storage areas, classify products, and optimize warehouse operations.
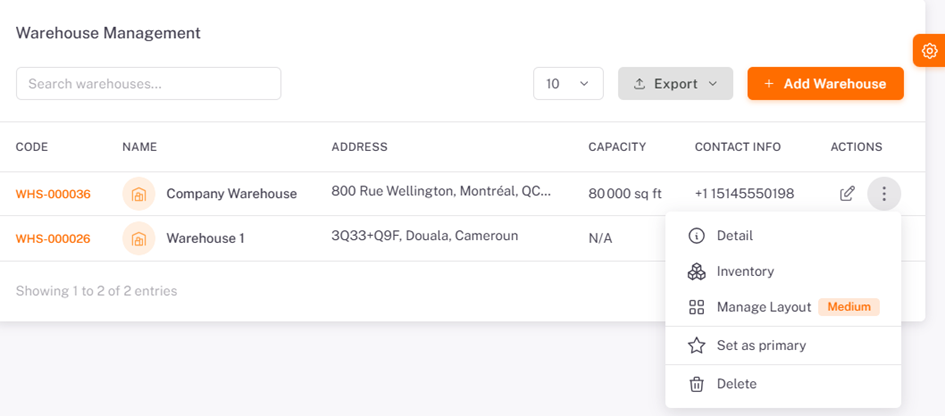
To access the warehouse layout configuration, navigate to Administration > Warehouses, click the Actions button for the desired warehouse, and then select Manage Layout.
Selecting a Warehouse Layout
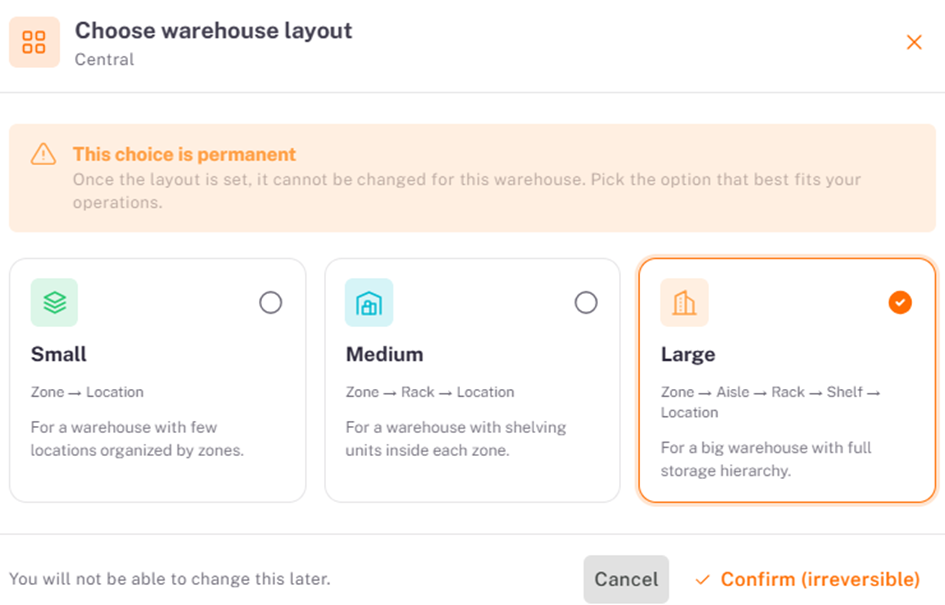
Before configuring the warehouse, the user must choose the warehouse layout that best matches the physical structure of their facility. This selection determines how storage locations will be organized throughout the warehouse then, click to" Confirm".
Note: This choice is permanent. Once a layout has been selected and confirmed, it cannot be changed for the current warehouse. Therefore, users should carefully choose the option that best fits their operational needs.
The warehouse configuration process consists of five steps:
Step 1 – Warehouse Overview
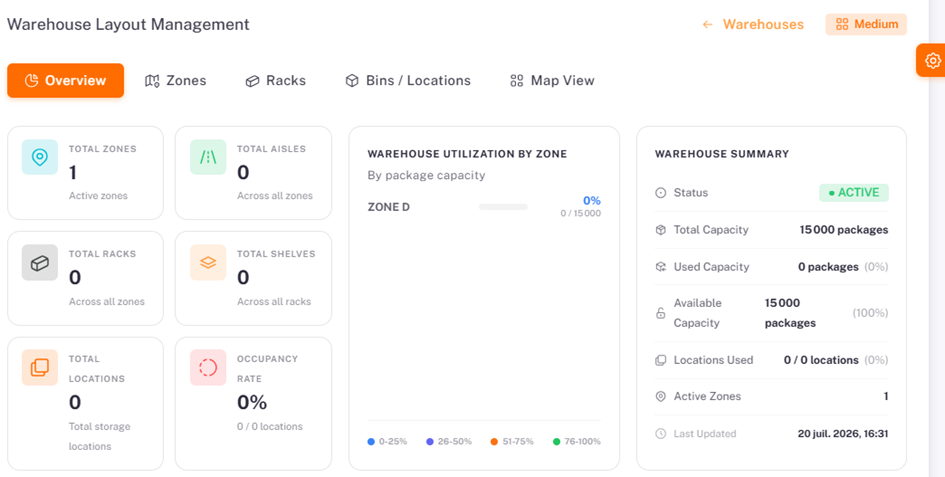
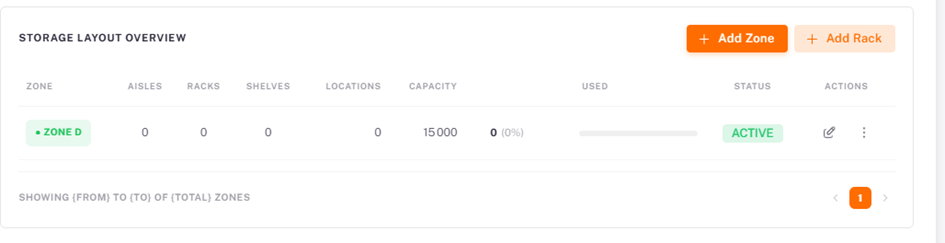
This page provides a visual summary of the warehouse configuration and serves as the starting point for creating and managing warehouse components such as zones, racks, and bins.
the user is presented with an overview of the warehouse layout.
Step 2 – Creating a Zone
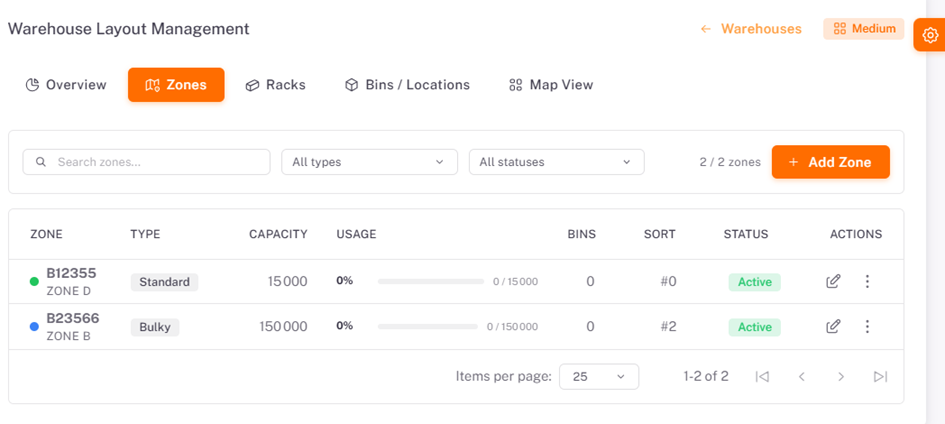
Zones are used to divide the warehouse into different storage areas. Each zone can represent a specific section, product category, or operational area within the warehouse.
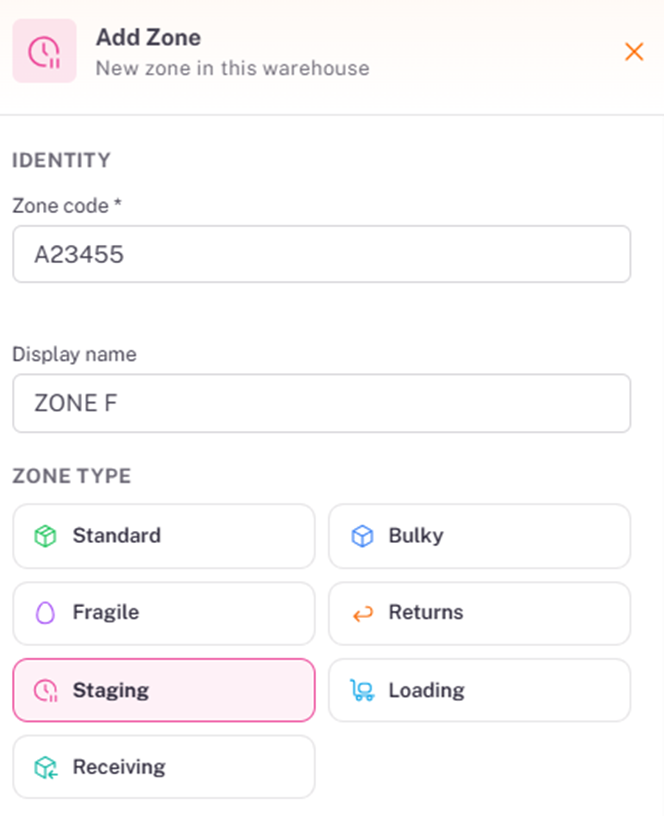
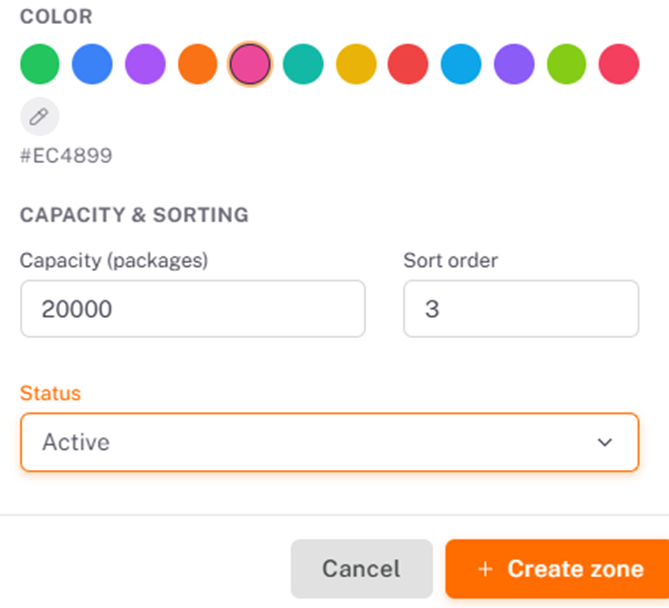
To create a new zone, click Add Zone. A configuration form will appear where the following information must be completed.
Information to Complete
Zone Code: Enter a unique identifier for the zone.
Example:Z-001Display Name: Enter the name that will be displayed throughout the system
Zone Type: Select the type of zone based on its intended purpose
Zone Color: Choose a color to visually identify the zone on the warehouse layout
Capacity: Specify the maximum capacity of the zone
Status: Select whether the zone is active or inactive
After completing all the required fields, click Create Zone to save the new zone.
Step 3 – Creating a Rack
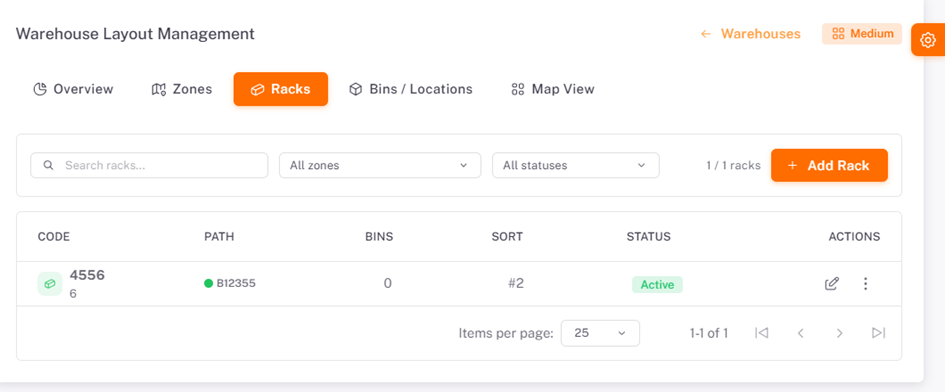
Racks are used to organize products within each warehouse zone, making inventory easier to locate and manage.
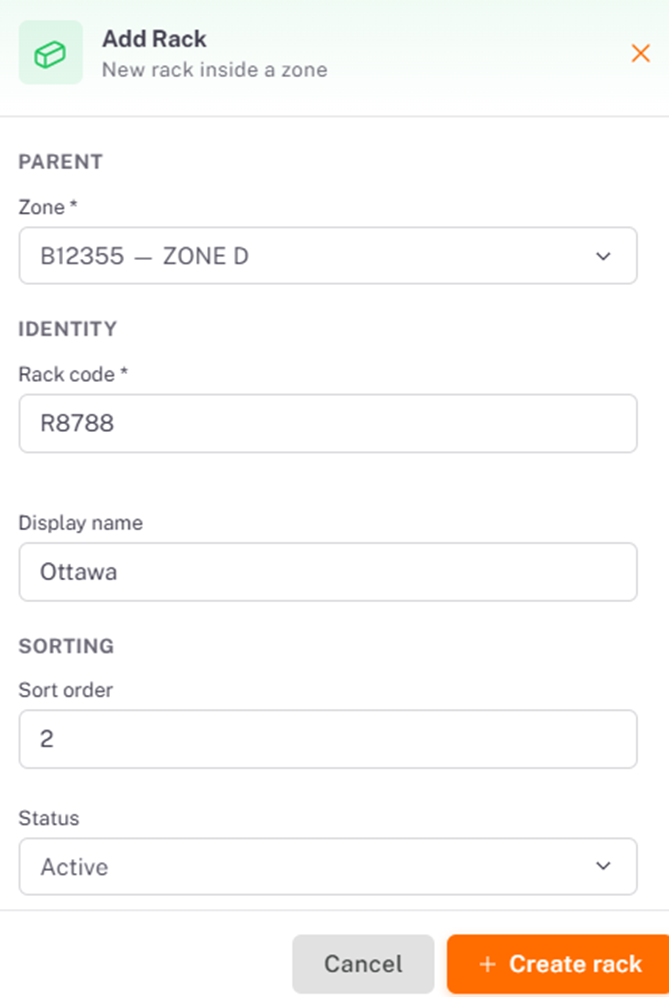
To create a rack, click Add Rack, complete the required information in the form, and then click Create Rack to save the configuration.
Step 4 – Creating a Bin
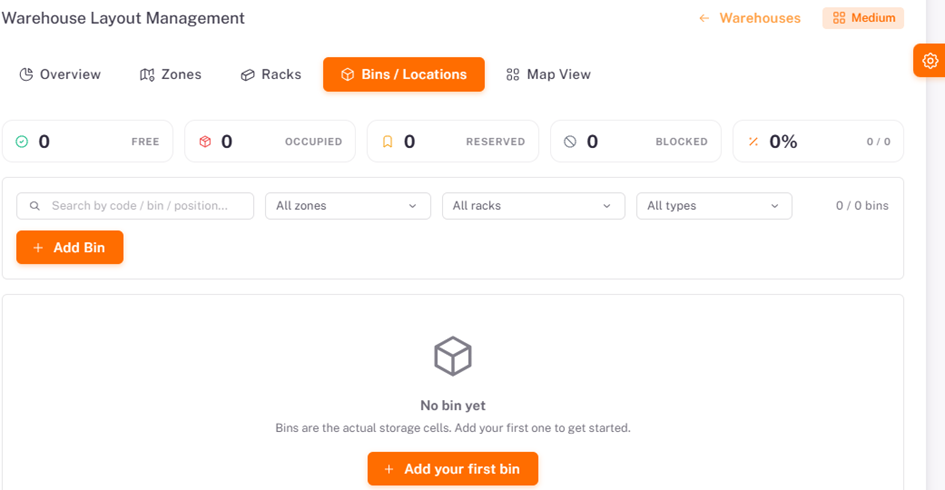
Bins represent the smallest storage locations within the warehouse where products are ultimately stored.
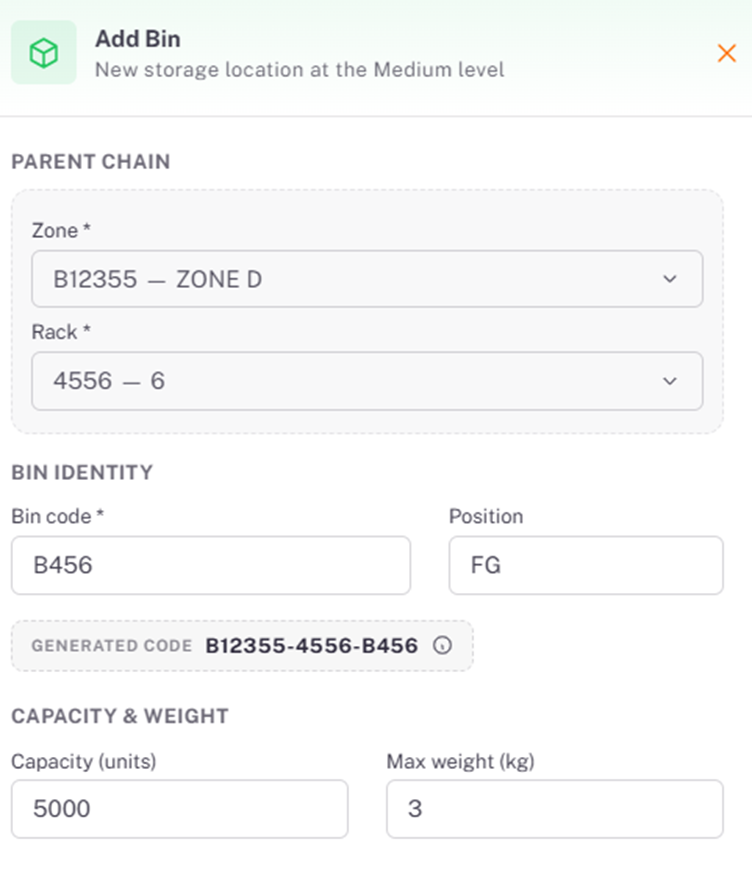
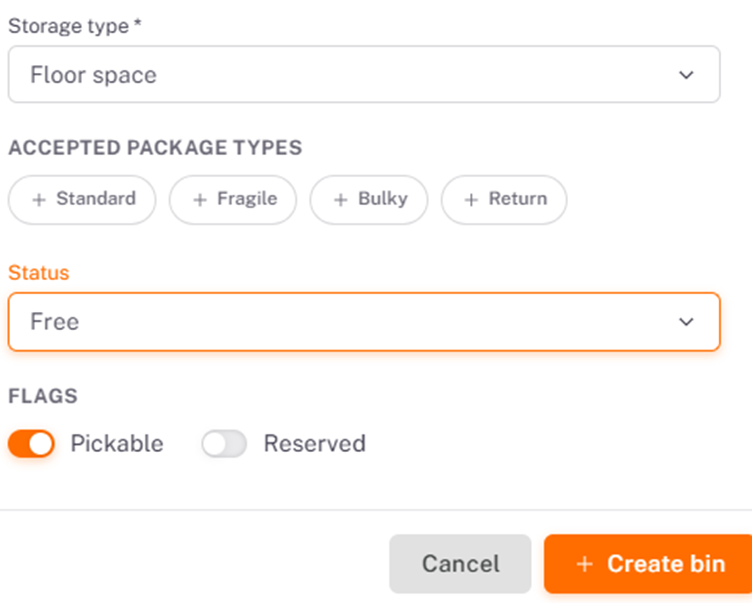
To create a bin, click Add Bin, complete the required information in the form, and then click Create Bin to add the new storage location.
Step 5 – Map View
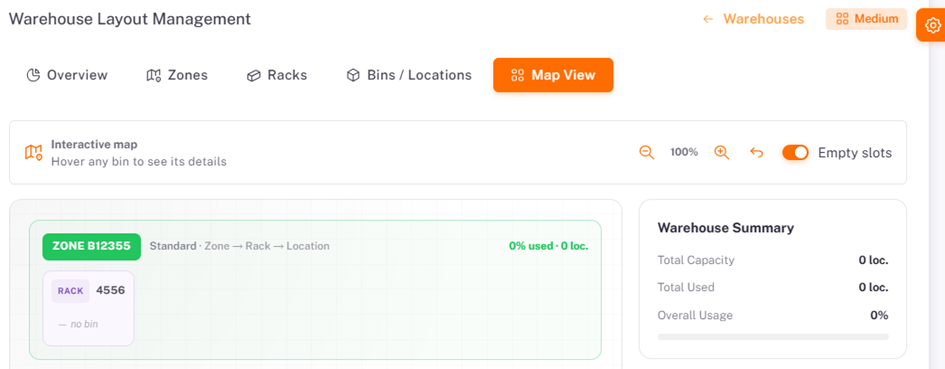
The Map View provides a graphical representation of the warehouse layout. It allows users to visualize all configured zones, racks, and bins in a single interface, making it easier to verify the warehouse structure and ensure that the digital layout accurately reflects the physical warehouse.
This view also simplifies inventory management by providing a clear overview of all storage locations.
Was this article helpful?
Still need help?
Contact support