
Table of contents
Dropioo Merchant Getting Started Guide
Part 3 – Managing Your Workspace and Getting Started Successfully
Overview
Once your Dropioo Merchant account has been created and your initial setup has been completed, your workspace is ready to support your delivery operations.
A properly configured merchant account ensures that your business information, pickup location, and delivery partnerships are correctly connected before processing shipments.
This section provides recommendations to help you maintain an efficient workspace and prepare your account for daily logistics activities.
Orders
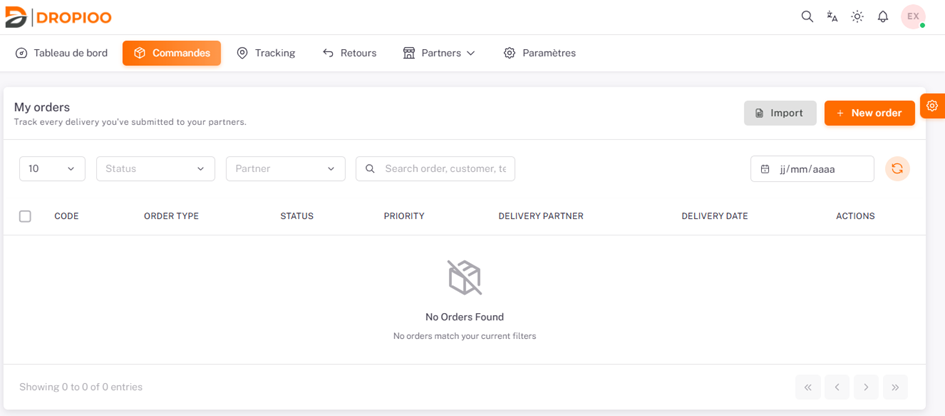
The Orders module allows merchants to create and manage delivery requests.
From this section, you can:
Create new orders.
Review existing orders.
Manage customer delivery information.
Assign deliveries to connected partners.
Orders can be created individually through the order form or uploaded in bulk using supported files.
A. Order Creation via Form
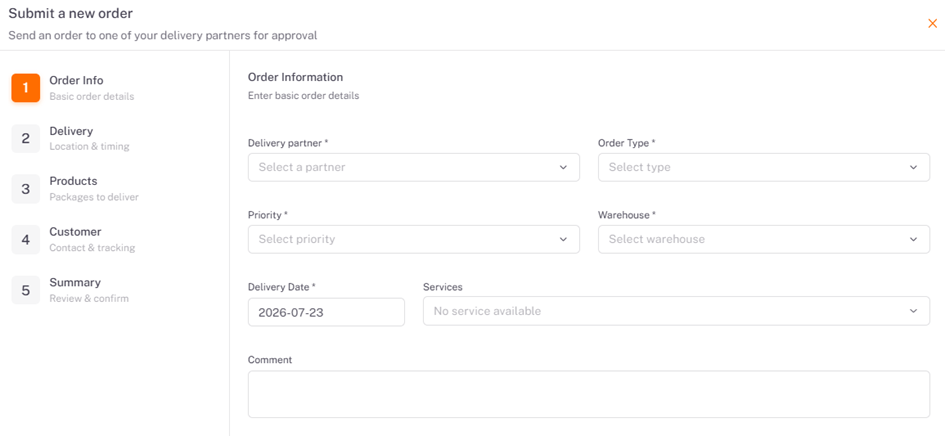
Click to « + New order » button at the top right;
Complete the guided 5-step form (Submit a new order):
1. Order Info: Select the delivery partner (Delivery partner), order type (Order Type), priority (Priority), warehouse (Warehouse), delivery date (Delivery Date), and add optional comments.
2. Delivery: Enter the shipping address and dispatch timeframe.
3. Products: Specify details and package content.
4. Customer: Enter customer recipient contact details.
5. Summary: Review details and confirm submission for partner approval.
B.Bulk Order Creation via File Import
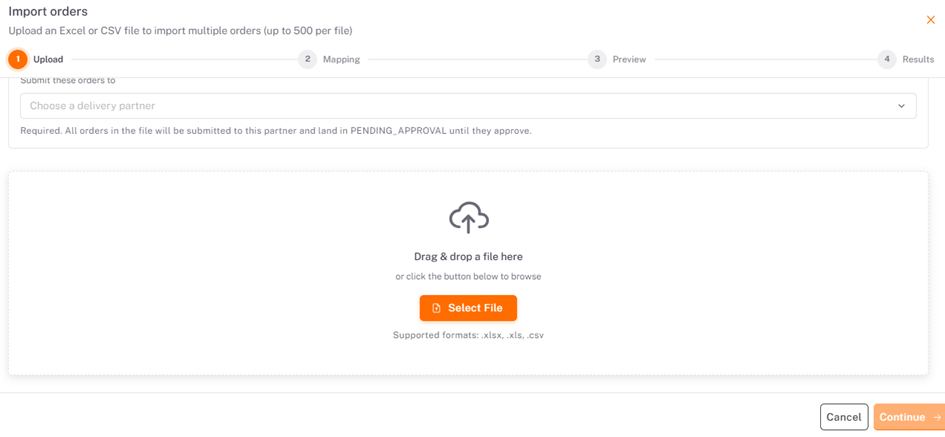
Click the « Import » button (located next to + New order).
In the Choose a delivery partner section, select the target logistics provider.
Drag and drop your file or click the orange « Select File » button (Supported formats: .xlsx, .xls, .csv – up to 500 orders per file).
Proceed through Mapping, Preview, and Results confirmation steps.
Real-Time Shipment Tracking ("Tracking")
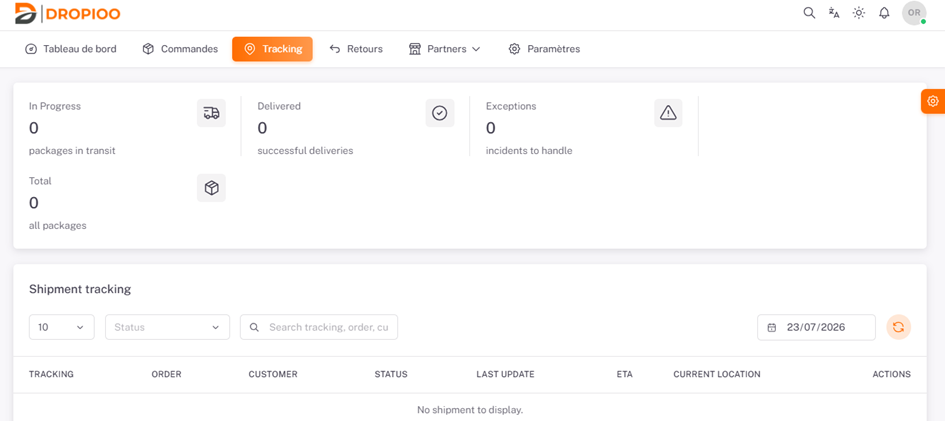
Click the « Tracking » tab in the main navigation bar to monitor ongoing deliveries.
1. Reviewing Dispatch Counters
In Progress: Total number of packages currently being handled by delivery partners.
Delivered: Number of successfully completed deliveries.
Exceptions: Incidents or issues reported during delivery (e.g., incorrect address, customer absent).
Total: Total cumulative count of registered packages.
2. Searching and Filtering Packages
Use the « Search tracking, order, customer » bar to search by tracking number, order ID, or customer name;
Filter by delivery status using the « Status » drop-down menu;
Filter by dispatch date using the calendar field.
3. Detailed Tracking Table (Shipment tracking)
This table details each shipment with the following information:
Tracking: Unique tracking code of the shipment.
Order: Associated order number.
Customer: Recipient's name and contact information.
Status: Current progress status of the delivery.
Last Update: Date and time of the last recorded event.
ETA: Estimated time of arrival.
Current Location: Current geographical location of the package.
Actions: Access full shipment history and detailed course information.
Return Management ("Returns")
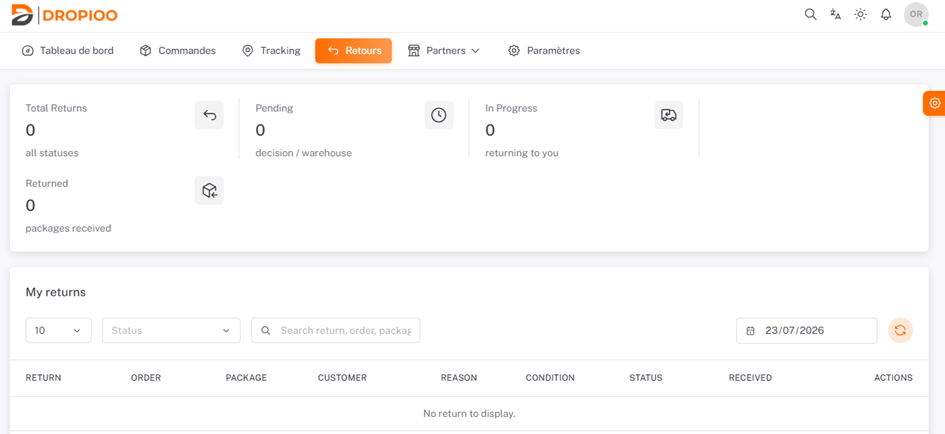
Click the « Returns » tab in the navigation bar.
Overview: Consult the summary of pending return decisions (Pending), in-transit returns (In Progress), and received items (Returned).
Request Tracking: The My returns table lists returned packages along with return reasons (Reason), product condition (Condition), and processing status.
Logistics Partner Management ("Partners")
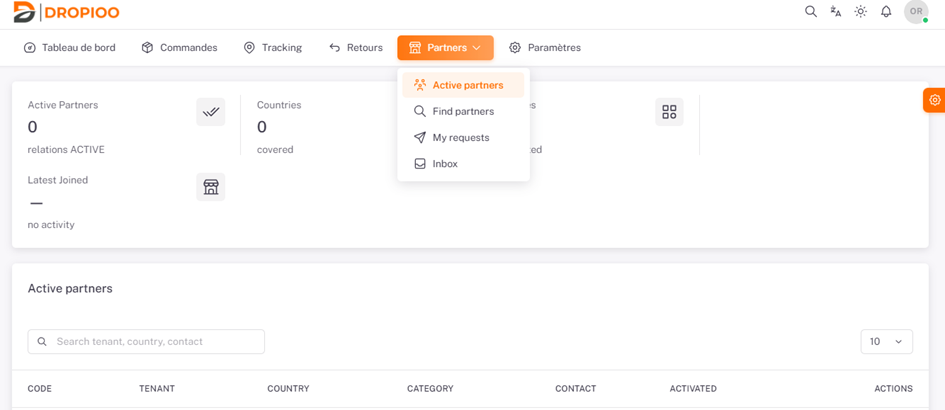
Hover over or click the « Partners » section in the top menu.
1. Subsections of the Partners Area
Active partners: Displays all delivery companies and couriers that have accepted your invitation and are currently connected to your account.
Find partners: Search for logistics providers by name/region and send them connection requests.
My requests: Track the status of sent invitations (Pending / Accepted / Declined).
Inbox: Contains messages and notifications exchanged with delivery companies.
2. Partnership Process and Order Assignment
Partner Selection: Search and select an existing delivery company from the platform directory, or create a new partner entry if they are not yet listed.
Sending the Invitation: Send a formal connection invitation to the selected delivery company.
Partner Acceptance: The delivery company receives your request and must accept it on their end.
Order Assignment (Mandatory Requirement): Only after the delivery company has accepted the invitation can the merchant assign orders to them during creation or bulk import.
Account Settings and Data Management
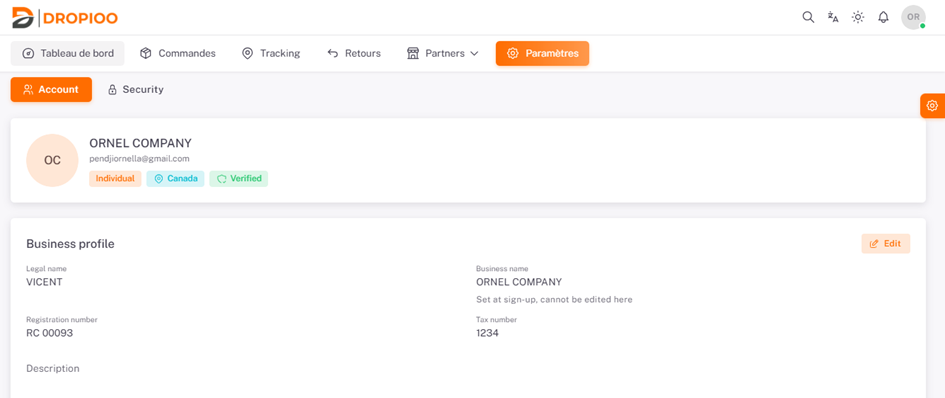
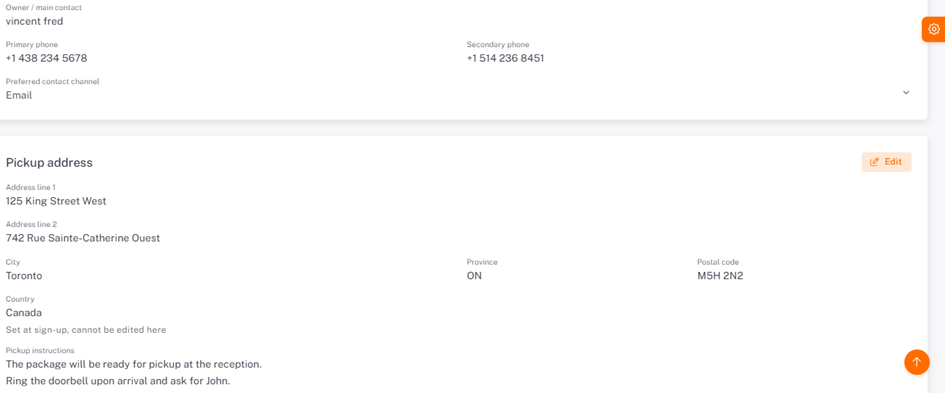
Click the « Settings » tab in the navigation bar.
1. Business Profile (Account)
Business profile: View legal and administrative details. To update company name, tax IDs, or contacts, click the orange « Edit » button at the top right of the section.
Pickup address: Review the pickup location address. To add or modify dispatch locations and instructions, click the orange « Edit » button in the Pickup address section.
2. Security (Security)
Click the « Security » sub-tab to change your password or configure account security settings
Was this article helpful?
Still need help?
Contact support